
Microsoft Bookings
Connect your Microsoft Bookings calendar so buyers can pick a real opening and book straight onto your calendar.
If your team schedules meetings with Microsoft Bookings, you can connect that calendar to Top Provider. Buyers then see your real openings and book straight onto your calendar. Your Microsoft 365 administrator approves the connection once, and after that everything is self-serve.
How It Works
Top Provider connects to your shared Bookings page through Microsoft's own API. When a buyer wants to meet with you, we read your live availability and show the buyer the same openings your own booking page would show. When the buyer picks a time, we create the appointment on your Bookings calendar.
The appointment behaves like any other Bookings appointment. Microsoft sends the confirmation email, and if your service has online meetings switched on, the appointment carries a Teams link. If the buyer reschedules, we move the same appointment. If the buyer cancels, the appointment is cancelled with a note that says the buyer cancelled through Top Provider.
Availability follows the rules you already set in Bookings: business hours, each staff member's hours and calendar, the service duration, buffer time, and your scheduling policy. We read those settings and never change them. The meeting length buyers see is the duration on your service.
If we cannot read your calendar for any reason, booking is not lost. It falls back to your booking link if you have one. Both can cover the same lead order; the connected calendar wins whenever it is readable.
What You'll Need to Set Up This Integration
The setup spans two systems. Your Microsoft 365 has to hold a bookable calendar, and the Seller Portal is where you connect it to Top Provider.
In Your Microsoft 365
- A subscription that includes Bookings. Most Microsoft 365 and Office 365 business, enterprise, and education plans do, including Business Basic and Business Standard. Business Premium is not required. See Microsoft's overview for the full plan list.
- Bookings switched on for your organization. It usually is, but an administrator can have turned it off tenant-wide. See Turn Bookings on or off.
- A shared Bookings page with at least one service that has staff assigned. A personal "Bookings with me" page cannot be connected, and there is no workaround. See Enter business information, Add staff, and Define service offerings. The next section walks through the parts that matter to Top Provider.
- Someone who administers your Microsoft 365. The approval must come from an administrator; a normal user cannot grant it. If that is not you, the Seller Portal gives you a link to send them.
In the Seller Portal
- A Seller Portal login. The whole Top Provider side happens on the Meetings page: starting the approval, choosing the page and service, and picking the lead orders it covers. No other configuration is required on our side.
Set Up in Microsoft 365
Many teams have already done this part. You need a shared booking page with at least one service that has staff assigned. If you already have one, skip to Connect in the Seller Portal.
Create a Shared Booking Page
Go to the Bookings home page at book.ms, find the Shared booking pages section, and select Create booking page. Give the page a name. The name becomes the page's email address and public link, so it is also how the page appears in the Seller Portal.
Choose Who Can Book
On the last wizard screen, Choose who can book appointments, select Anyone. Microsoft preselects People in my organisation, which makes the page internal only. Buyers are outside your organization, so they cannot be booked onto an internal page. You can change this later on the Booking page tab if you missed it.
Assign Staff to a Service
Microsoft creates a first service for you (Virtual consultation, 30 minutes). Keep it or add your own. Then open the service, go to Assign staff, and select at least one person. Availability comes from staff calendars, so a service with no staff assigned never shows an opening.
Turn On Online Meetings
In the service's Basic details, make sure Add online meeting is switched on. It attaches a Teams link to each booked appointment, and a service without it can show buyers no openings at all. Microsoft's own starter service has it on already; a service you create yourself may not.
The settings vendors most often miss are Anyone under who can book, staff assigned to the service, and Add online meeting on the service. All three look fine when skipped, and all three can result in buyers seeing no times.
Connect in the Seller Portal
Start the Approval
Open Meetings in the Seller Portal. On the Microsoft Bookings card, select Connect. If you administer your own Microsoft 365, select Approve with Microsoft and sign in. If someone else does, use Copy link for your IT team and send them the link.
Have Your Administrator Approve
The administrator opens the link, signs in to Microsoft, and approves Top Provider's Bookings permissions. The link is valid for one hour; if it expires, generate a fresh one from the Meetings page. After approving, the administrator sees a page that says whether the connection worked and, if not, what to do next.
Add the Meeting
Back on the Meetings page, the button now reads Add meeting. Choose your shared booking page and the service buyers book. The picker shows each service's duration and how many staff are assigned. The timezone comes from your booking page; if Bookings does not report one, pick the timezone your hours are in.
Choose Which Lead Orders It Covers
Select the lead orders this calendar covers. Each lead order can sit in only one Microsoft Bookings meeting, so a lead order already in another one is greyed out until you remove it there. A lead order with a booking link is not blocked, because the link stays as the backup.
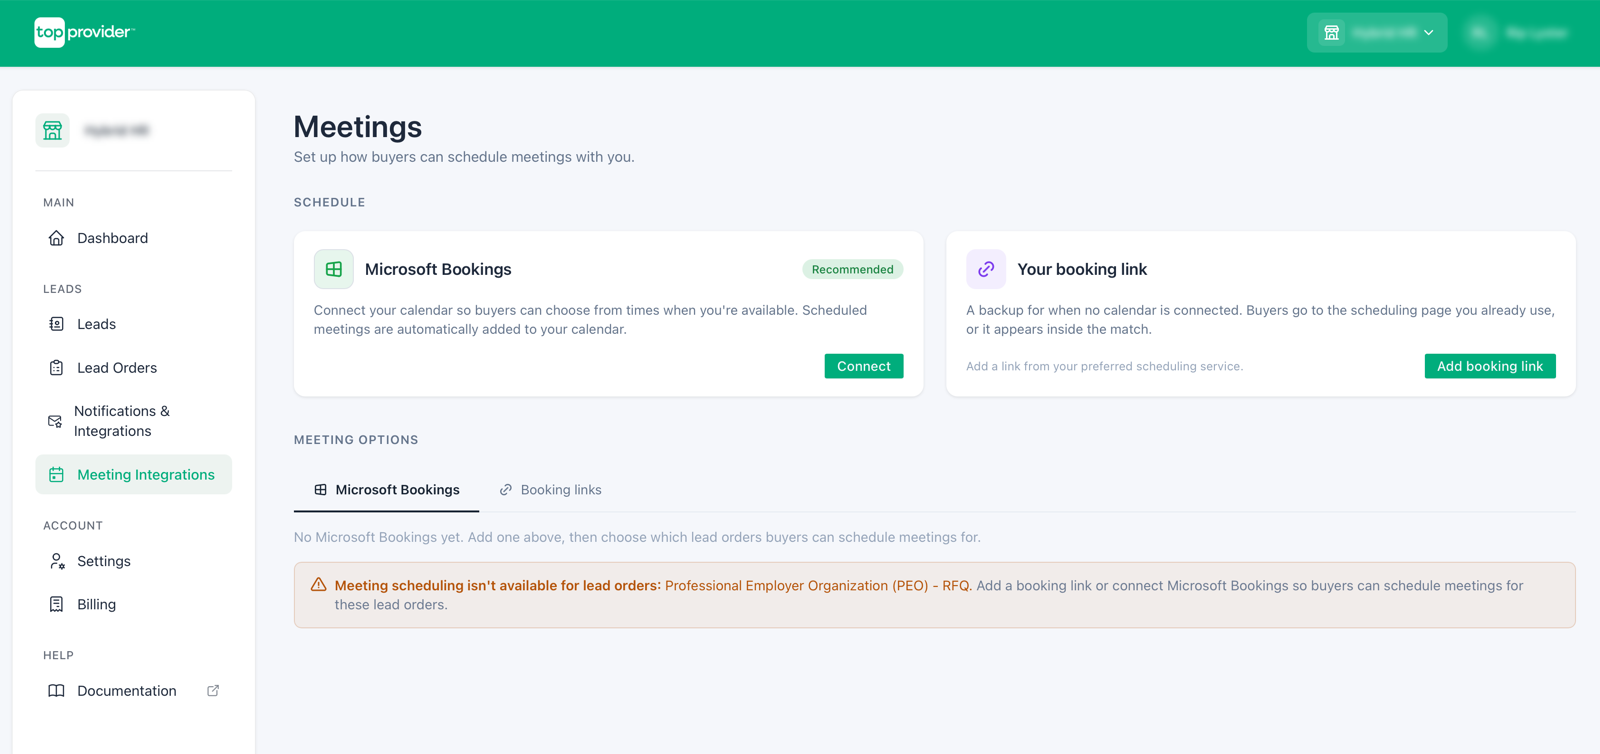 The Meetings page before connecting. The Microsoft Bookings card offers Connect. The booking link card beside it is the backup option.
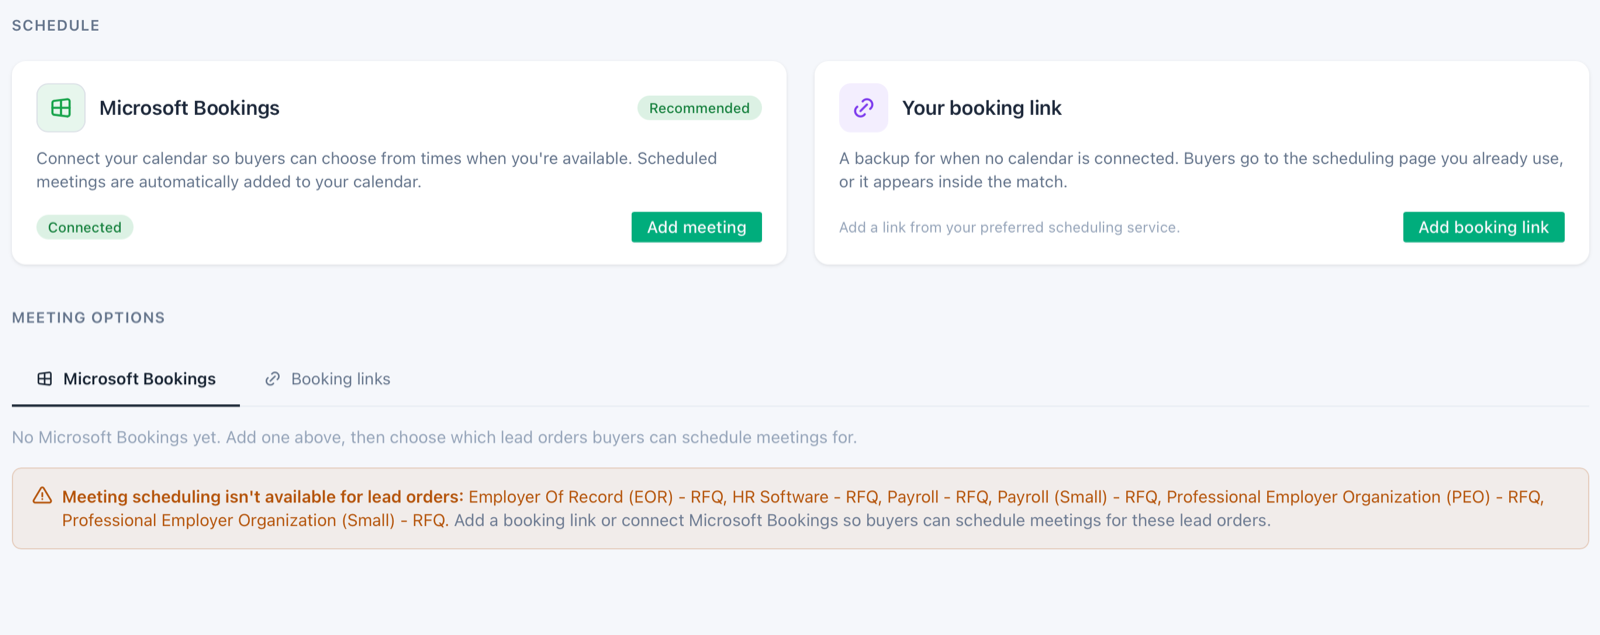 Once the connection is approved, the card shows Connected and the button reads Add meeting.
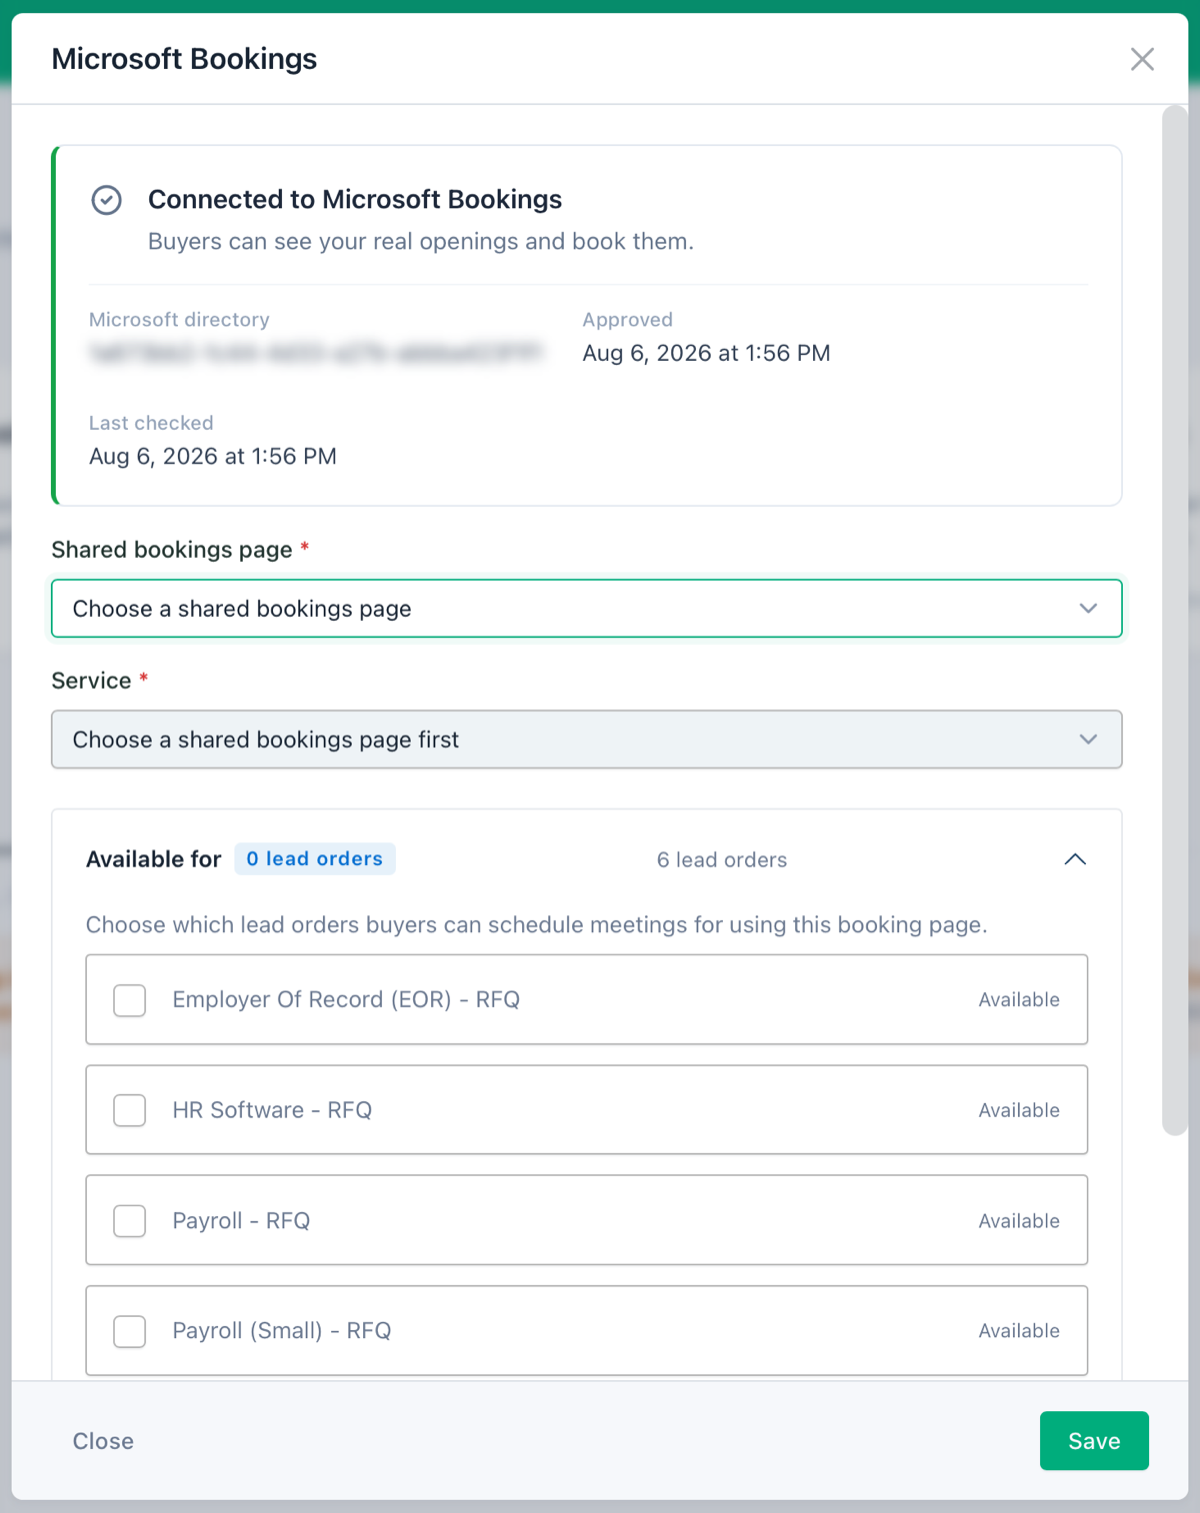 Adding a meeting: the connection details, then the shared booking page and service pickers, then the lead orders it covers.
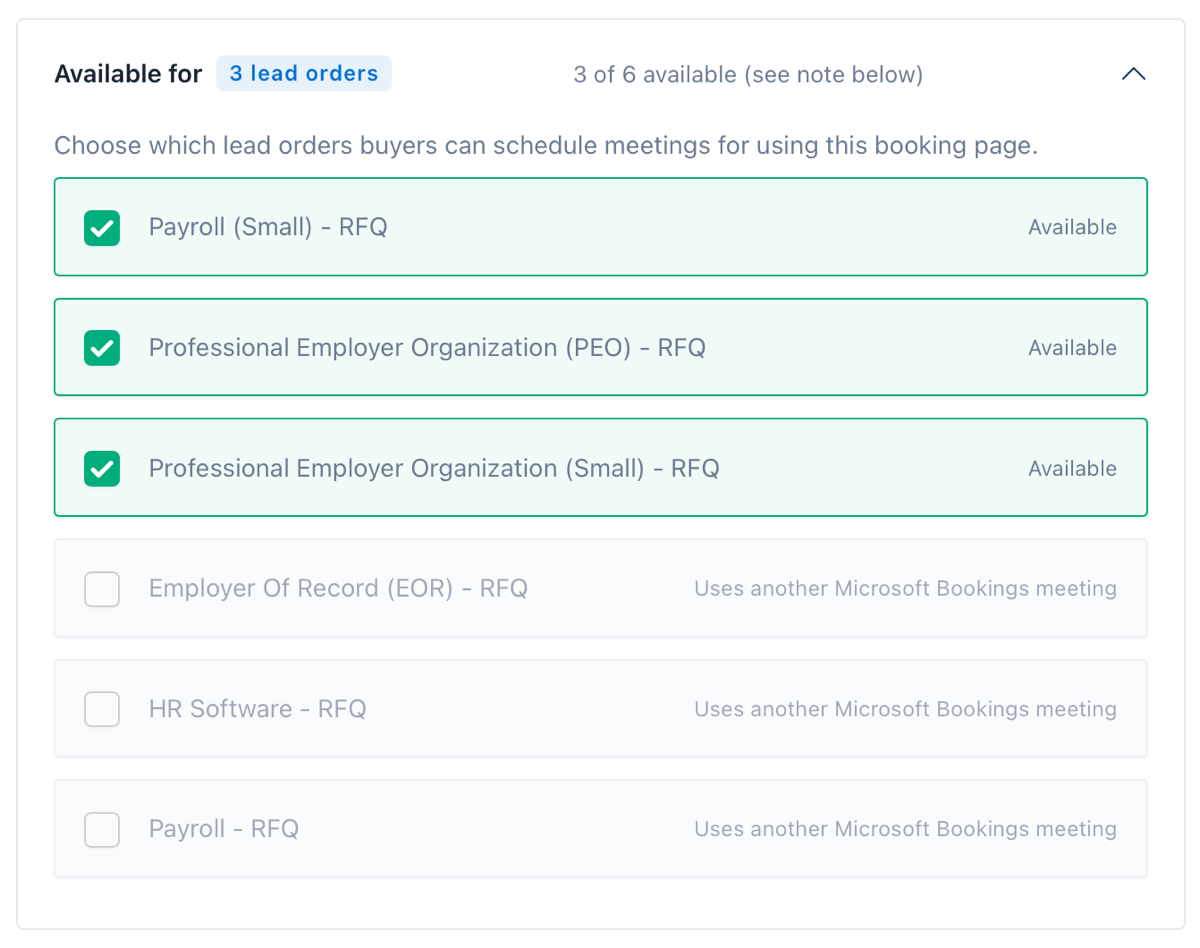 Choosing lead orders. The greyed-out rows already sit in another Microsoft Bookings meeting.
What the Administrator Approves
This is the step vendors ask the most questions about, so here is exactly what happens:
- Three permissions are requested:
Bookings.Read.All,Bookings.ReadWrite.All, andBookings.Manage.All. Together they cover reading availability and creating, changing, and cancelling appointments. Microsoft offers no version of these that a single user can approve for themselves, which is why an administrator is required. - It is granted once for your whole Microsoft 365 directory. Adding more meetings later never involves your IT team again.
- No credentials are ever shared with us. The administrator signs in on Microsoft's own page. Top Provider never sees a password and stores no tokens or secrets.
- The approval is verified, not assumed. We confirm it by reading your Bookings calendar before showing the connection as working.
What to Do if Approval Isn't Successful
After approving, the administrator sees a result page. When the connection worked, the page says Connected and there is nothing more for your IT team to do. When it didn't, the page names one of these results:
| Result | What happened | What to do |
|---|---|---|
| Link expired | The link was more than an hour old. Nothing changed. | Generate a fresh link from the Meetings page. |
| Not completed | The administrator closed or declined the Microsoft prompt. | Open the same link again and approve. |
| No shared calendar | The approval worked, but the directory holds no shared Bookings page. | Create a shared booking page, then use the link again. |
| Permission missing | The approval went through, but Microsoft still refuses the permissions. | Grant admin consent for the Bookings permissions in Microsoft Entra, and make sure Bookings is on for the organization. |
| Blocked by policy | A Conditional Access policy for workload identities is refusing the connection. | Your IT team excludes the Top Provider service principal from that policy. Approving again cannot fix this one. |
| Already connected elsewhere | A different Microsoft directory is already connected to this account. | Contact Top Provider to release the existing connection. |
| Something on our side | Top Provider hit an internal error. | Nothing. We can see the details and follow up. |
Only two of these need your IT team a second time: permission missing and blocked by policy.
Troubleshooting
Start With a Test Booking
Every meeting has a Test button that reads your calendar and books exactly the way a buyer does, so it shows you what buyers see: the openings, the slot length, and the timezone. Pick a date and time and book it; the appointment arrives on your Bookings calendar. The test creates a real appointment, so delete it in Microsoft Bookings afterwards.
Run a test once after setup, and again after any change you make while troubleshooting. If the test cannot read your calendar at all, a buyer hits the same thing; recheck the connection on the Meetings page and the service you picked.
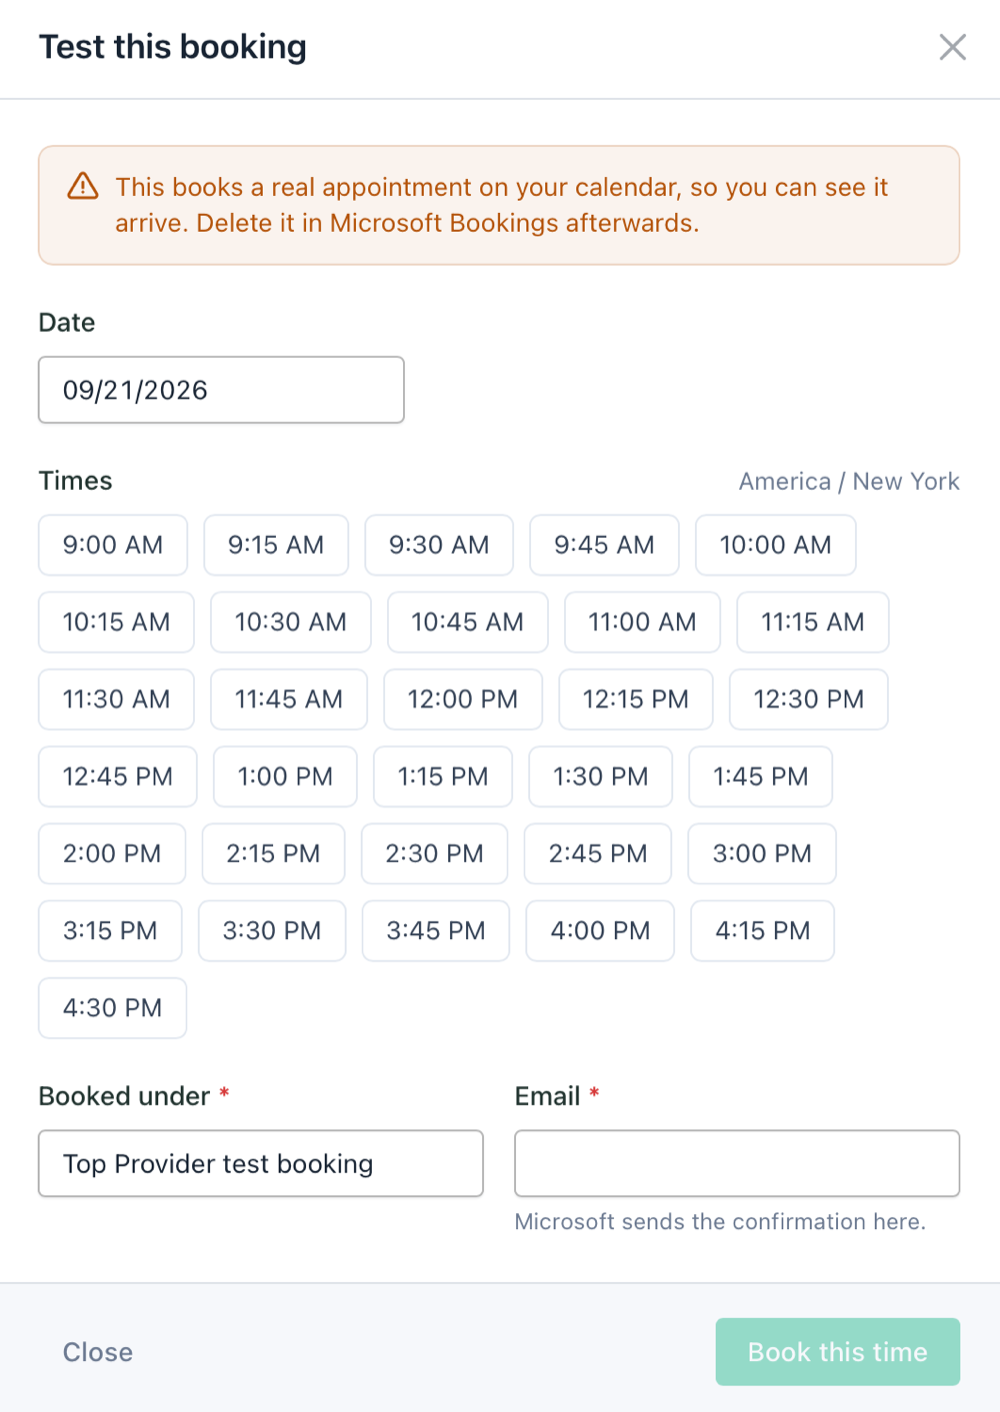 The test booking shows the same openings a buyer sees, in the meeting's timezone. Microsoft sends the confirmation to the email you enter.
Wrong or Missing Times
When the test or a buyer sees the wrong times, or no times, the cause is nearly always a Bookings setting:
| What buyers see | The setting behind it |
|---|---|
| No times at all, ever | The service has no staff assigned, or its Add online meeting option is switched off. Check both on the service. |
| Nothing today or tomorrow | Lead time in your scheduling policy. Openings inside that window are withheld even when the calendar is free. |
| Nothing beyond a few weeks | Maximum days in advance in your scheduling policy. |
| Times only on the hour, or at odd minutes | Time increments in your scheduling policy. |
| Meetings are the wrong length | Duration on the service. We take it as given and cannot override it. |
| Fewer openings than the calendar suggests | Buffer time on the service, or a staff member's own calendar or narrower hours. |
| Openings outside working hours | Business hours on the page, and each staff member's own hours. |
| Times are an hour or more off | The page timezone in Bookings against the timezone shown on the meeting in the Seller Portal. |
None of these is a Top Provider setting. Each one is changed in Microsoft Bookings, and takes effect on our side immediately; there is nothing to re-sync. After changing one, run another test booking to confirm the fix.
FAQ
Need help? Contact our support team at [email protected] if you need assistance.